
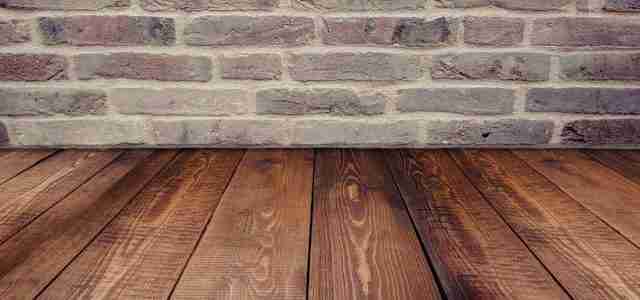
Refinishing your hardwood floors can breathe new life into your space, enhancing the beauty and value of your home. Understanding the time commitment involved in the process is crucial for planning and setting realistic expectations. This guide will walk you through everything you need to know about the duration of hardwood floor refinishing.
Understanding Hardwood Floor Refinishing
Hardwood floor refinishing involves sanding down the top layer of the floor to remove old finishes and imperfections, followed by the application of a new stain and protective sealant. It’s a meticulous process that requires precision to ensure a smooth and even finish.
The goal of refinishing is to restore the floor’s original luster and beauty. This process can significantly extend the lifespan of your flooring by protecting it from wear and tear. Additionally, refinishing can change the color of the wood, allowing you to update the look of your space without replacing the floors entirely. This is why many homeowners in Columbus trust professionals for wood floor refinishing in Columbus, Ohio.
Refinishing is more than just a cosmetic upgrade. It also involves addressing potential issues like scratches, dents, and warping, which can affect the structural integrity of your floors. A well-refinished floor can enhance both the aesthetic and functional aspects of your home.
Factors Affecting Refinishing Time
Several factors can influence the time it takes to refinish hardwood floors. Understanding these variables can help you better estimate how long your project might take.
- Size of the Area: The larger the area, the more time it will take to sand, stain, and seal the floor. A small room may be completed in a day, while an entire house could take several days.
- Condition of the Floor: Floors with extensive damage, such as deep scratches or significant wear, will require more intensive sanding and preparation, which can extend the project timeline.
- Type of Finish: Different finishes have varying drying times. Oil-based polyurethanes, for example, take longer to dry than water-based options, potentially adding extra days to the process.
Other considerations include the weather conditions, as humidity and temperature can affect drying times, and the number of coats of finish applied. Each coat needs adequate time to dry before the next layer can be added.
Step-by-Step Process of Hardwood Floor Refinishing
Refinishing hardwood floors involves several critical steps. Each phase of the process is important for achieving a professional and long-lasting result.
- Preparation: Clear the room of furniture and cover nearby areas to protect them from dust. This stage also involves cleaning the floors thoroughly to remove any debris or dirt.
- Sanding: Sanding is the most labor-intensive step. Using a drum sander, the top layer of the floor is removed to eliminate old finishes and imperfections. This process may involve multiple rounds of sanding with increasingly finer grit sandpapers.
- Staining and Sealing: After sanding, the floor is cleaned again before applying the stain. Once the stain dries, a protective sealant is applied to safeguard the wood from future damage.
Each step requires precision and care to ensure a uniform finish. Rushing through any phase can lead to unsatisfactory results, necessitating additional work.
Average Timeframe for Refinishing Hardwood Floors
On average, refinishing a hardwood floor takes about 3 to 5 days. However, this can vary based on the factors previously discussed.
- Day 1-2: Sanding and initial cleaning, which can take up to two days depending on the floor’s condition and the size of the area.
- Day 3: Staining the floor, which typically takes a full day to apply and dry properly.
- Day 4-5: Applying sealant and allowing it to cure, which may require additional days if multiple coats are needed.
It’s important to note that while the physical work may be completed in this timeframe, you may need to wait a few extra days before moving furniture back into the room to ensure the finish cures completely.
Preparation: Getting Ready for Refinishing
Preparation is a crucial part of the refinishing process. Proper preparation ensures the work is efficient and the results are long-lasting. Start by removing all furniture and decor from the room. This includes rugs, curtains, and any wall hangings that might collect dust during the sanding process. Once the room is cleared, it’s essential to clean the floor thoroughly to remove dirt and debris that could interfere with sanding.
Protecting other areas of your home is also important. Use plastic sheeting to cover doorways and vents to prevent dust from spreading. Additionally, ensure that you have all the necessary tools and materials on hand before beginning the project.
Taking these steps not only facilitates a smooth refinishing process but also helps prevent potential damage to other areas of your home.
Post-Refinishing Care and Maintenance
Once your floors are refinished, proper care and maintenance are vital to preserving their new appearance. Implementing a few simple strategies can help keep your floors looking pristine for years.
- Allow Proper Curing Time: Before walking on the floor or replacing furniture, ensure the finish is fully cured. This typically takes about a week, depending on the type of finish used. For oil-based finishes, it’s recommended to wait at least 48 hours before light foot traffic, and up to 7–10 days for full curing. Water-based finishes may require 7–10 days for full curing.
- Regular Cleaning: Use a soft broom or vacuum with a hardwood setting to remove dust and debris. Avoid using harsh chemicals or steam cleaners that can damage the finish.
- Use Protective Pads: Place felt pads under furniture legs to prevent scratches. Additionally, consider using area rugs in high-traffic areas to reduce wear. However, wait at least 14–18 days before placing rugs to allow the finish to cure properly.
Routine maintenance not only enhances the appearance of your floors but also extends their lifespan, making your investment in refinishing worthwhile.
Benefits of Professional vs. DIY Refinishing
Deciding between professional and DIY refinishing depends on several factors, including your skill level, budget, and available time. Professional refinishing offers several advantages, such as expert knowledge, access to high-quality equipment, and guaranteed results. A professional can handle unexpected challenges and ensure a flawless finish.
On the other hand, DIY refinishing can be a cost-effective option for those with experience and confidence in their abilities. It allows for greater control over the process and can be a rewarding project for hands-on homeowners. However, it requires time, patience, and a willingness to learn.
Consider your priorities and limitations before making a decision. While DIY can save money upfront, mistakes or subpar results may necessitate costly corrections. Weigh the pros and cons carefully to determine the best approach for your situation.
Cost Considerations for Hardwood Floor Refinishing
The cost of hardwood floor refinishing can vary widely based on several factors. Understanding these can help you budget effectively.
- Professional Services: Hiring a professional can cost anywhere from $3 to $8 per square foot, depending on the region, company reputation, and the complexity of the job.
- DIY Costs: If you choose to do it yourself, you’ll need to rent or purchase equipment like sanders and buy materials such as sandpaper, stain, and sealant. While potentially cheaper, DIY costs can add up if mistakes occur.
- Additional Expenses: Consider potential additional costs, such as moving furniture or addressing unexpected floor repairs.
Careful budgeting ensures you’re prepared for all aspects of the refinishing project, reducing stress and ensuring a smooth process.
Summary
Refinishing your hardwood floors can be a time-consuming project, but the results are often well worth the effort. A beautifully refinished floor enhances the appearance of your home and increases its value. By understanding the refinishing process and planning accordingly, you can ensure that your investment in time and resources yields a rewarding outcome. Whether you choose to hire a professional or tackle the project yourself, the key to success lies in thorough preparation and careful execution.